
BoxDocs
Find everything you need to get your enclosure working perfectly
Get to know your enclosure

Prusa MK3/4

Bambu Lab A1
- Supported Printers: Prusa MK3, Bambu Lab A1
- Dimensions: 640x540x 540mm (LxWxH)
- Weight: 12 kg
- Materials: Aluminum Frame + Polycarbonate Panels
- Panels: Top Panel hinge option. Removable side panels for electronics
- Expansion Options: Servo ports, SSR outputs, Fan outputs
- Open-Source Design: Fully Customizable, if needed you can change the UI, code, files.
- Two 140mm fans. Noctua option available
- Filtration System: HEPA + Activated Carbon Filters
- Chamber Cooling: Smart Fan System with Adjustable Speeds
- Airflow Management: Optimized for VOC and Particle Extraction
- Sensors: Temperature, Humidity, Air Quality
- Display: Full-Color 4.3 Inch Touchscreen
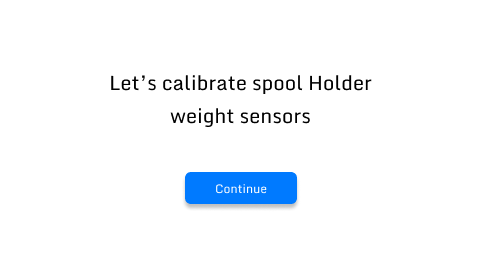
- Load cells for spools
- Connectivity: None at the moment, future upgrades planned
- Input Voltage: 220v / 120V
- Power Consumption: 20-100 Watts. Depends on fans
- Lighting: Customizable RGB LED Strips
- Cable Management: Built-in Channels
Get to know the parts
Filtration System
The Clura’s advanced filtration system ensures clean and safe 3D printing. Featuring two PWM-controlled 140mm fans—compatible with premium Noctua fans—it provides precise airflow management. Equipped with both HEPA and carbon filters, the system effectively captures harmful particles and neutralizes odors, maintaining optimal air quality in your workspace.
At Glance:
- Fans: Dual 140mm PWM-controlled (Noctua fans compatible)
- Filters: HEPA and carbon filters for particle and odor filtration
- Airflow Control: Adjustable via PWM for efficiency and quiet operation
- Fan Placement: Optimized for maximum air circulation and effective filtration
- Maintenance: Easy-to-replace filters for long-term performance


Advanced sensor suite
The Clura features a versatile and modular sensor system designed for optimal performance, safety, and environmental monitoring. Each sensor plays a critical role, and the modular setup allows for easy upgrades and customization to fit your needs.
- Environmental Monitoring: The DHT22 Sensor tracks temperature and humidity, while the BME680 Module monitors gas (VOC), pressure, humidity, and temperature to maintain ideal printing conditions.
- Air Quality Control: The PMS5003 Particle Sensor measures PM2.5 levels, ensuring cleaner air and better filtration system performance.
- Fire Safety: The Optical Smoke Sensor provides precise smoke detection, and the MQ2 Smoke Sensor detects combustible gases for enhanced safety.
- Filament Tracking: The HX711 Modules with Load Cells enable accurate weight measurement, helping you monitor filament usage efficiently.
Electronics detailed
The Clura features a robust and modular electronics system centered around two key PCBs: the Main PCB and the Sensor Board. These boards are connected via a reliable RJ45 cable, ensuring efficient communication and simplifying assembly. This dual-PCB architecture enables easy maintenance, upgrades, and scalability for future enhancements.
Main PCB: powered by the STM32F411CEU6 microcontroller, the Main PCB acts as the brain of the enclosure, controlling all primary functions. Components directly connected to the Main PCB include:
- Dual 140mm PWM fans and 60mm fans for airflow and cooling.
- TJC 4.3-inch display for data visualization and system controls.
- WS2811 LED strip for customizable lighting.
- HX711 load cells for filament tracking.
- 24V 4A PSU for consistent power delivery.
- Beeper for audible alerts.
Sensor Board:
Dedicated to monitoring environmental conditions and safety, the Sensor Board supports the following modules:- BME680 Sensor: Monitors temperature, humidity, and VOC levels.
- PMS 5003 Sensor: Measures PM2.5 particles for air quality assessment.
- DHT22 Sensor: Tracks temperature and humidity.
- MAX30105 Sensor: Detects particles like smoke or dust.
- MQ2 Smoke Sensor: Provides fire safety by detecting combustible gases.

Connection Details:
The Sensor Board connects to the Main PCB using a standard RJ45 cable, ensuring a robust and easy-to-assemble link. This modular setup not only improves reliability but also makes replacing or upgrading individual components straightforward.
Modularity and Scalability:
By splitting functionality between the Main PCB and the Sensor Board, the Clura is designed for flexibility and future-proofing. Whether adding new sensors, upgrading components, or replacing parts, the enclosure is built to grow with your needs.
Manual
Some useful details:
At Clura, we’ve created a detailed assembly manual to guide you through building your enclosure. While tailored for the Prusa MK3/4, it’s fully compatible with all versions, including the Bambulab A1. The only variations are in component sizes, like aluminum extrusions and acrylic panels. With clear instructions and visuals, assembly takes just 2–3 hours, no matter your experience level. We want to give a special thanks to the Voron design team as we have used their great manuals as inspirations for this one.
At a glance:
- Tools Needed: List of essential tools for assembly.
- Components used: List of essential components used for assembly.
- Step-by-Step Guide: Clear instructions for frame, panels, electronics, and cable management.
- Visual Aids: Photos, diagrams, and schematics for easy reference.
- Customization Tips: Options for adding accessories or personalizing your enclosure.
- Digital Access: Download the latest version with updates and community contributions once they become available
- Fast support: In the case of any problems contact us on discord or on our other socials and we’ll help you.


How to start:
- Open the box and check that everything looks alright
- Download the manual and start reading the introduction
- Once you get to a new section, take out from the box all of the materials that will be needed for that section as shown in the slides
- Once a section is completed put the parts aside
- If in doubt, double check with the 3D Model, or send a quick message on the discord server.
3D Files
Some useful details:
Every 3d printed part on the enclosure is made the fit on the build plate of the prusa Mk3/4 and Bambulab A1 printer (Minimum build size 220x220x100mm). Most parts can be printed without supports, but on a few we weren’t able to remove them need of having them. Every part that needs supports has in it’s name a SP, for example Part_1_SP. You can decide to slice the stl’s by yourself, or use our pre made gcodes. Some parts need some assembly before being used on the enclosure, but everything is explained in the manual
At a glance:
- Material: PETG or PLA (PLA suggested only for non critical parts)
- Filament used: ~1kg
- Approximate print time: 36h on MK3/4 ; 24H on Bambulab A1 (not final)
- Minimum build volume: 220x220x100mm
- Reccomended print settings:
- Layer height: 0.2mm
- Perimeters: 3
- Infill: 20%
| Name | Quantity | Supports |
|---|---|---|
| Cable guide Light | 1 | No |
| Front plate bed cable access | 1 | No |
| Lid Light | 1 | No |
| Light F Top | 1 | No |
| Light F | 1 | No |
| Light L Top | 1 | No |
| Light L | 1 | No |
| Light R Top | 1 | No |
| Light R | 1 | No |
| Main body screen | 1 | No |
| Sensors body Light | 1 | No |
| Top Hinge R | 1 | No |
| Top Hinge L | 1 | No |
| Acrylic guide bottom | 2 | No |
| Acrylic guide top | 2 | No |
| Bottom Hinge | 2 | No |
| Bottom Hinge FP | 2 | No |
| Bottom Moveable part FP | 2 | No |
| Extrusion guide bottom | 2 | No |
| Extrusion guide top | 2 | No |
| Handle L NoPC4 | 2 | No |
| Magnet Mount Side panels | 2 | No |
| Top Hinge FP | 2 | No |
| Top Moveable part FP | 2 | No |
| Magnet Holder | 4 | No |
| Handle | 3 | No |
| Plug | 3 | No |
Software
STM32 Firmware
The Clura enclosure is powered by the STM32F411CEU6 microcontroller on the Main PCB, handling sensors, fans, LED lighting, and the user interface. Its custom-built, open-source firmware ensures seamless functionality and future flexibility, with support for hardware additions or upgrades.
Features
- Sensor Management: Reads data from VOC, particulate, smoke, and temperature sensors.
- Hardware Control: Regulates fans, lighting, and modular components.
- UI Integration: Communicates with the 4.3-inch TJC touchscreen for real-time monitoring and control.
Flashing the STM32
- Look at the guide on github linked here: Guide on flashing


To view the full UI you can click on the button below which will bring you to the FIGMA page that contains it. Note, that the UI was designed on the TJC editor, which is available only in chinese.
User Interface Overview
The Clura offers an intuitive and feature-rich user interface, designed to streamline your 3D printing workflow and enhance usability. The interface is displayed on a TJC 4.3-inch touchscreen, connected directly to the Main PCB for seamless operation.
Clear and Responsive Display:
The high-resolution touchscreen (800×480) provides real-time information on temperature, humidity, air quality, and fan performance, ensuring you’re always informed about your printing environment.Comprehensive Control Options:
- Adjust fan speeds for optimal airflow and noise levels.
- Monitor and control lighting with the LED strip settings.
- Track filament usage via load cell data displayed on-screen.
- Alerts for fire safety sensors (MQ2 and Optical smoke sensor) and air quality warnings ensure quick responses to potential issues.
- Standby time and brightness allow for low light emission if printing overnight
The Logic of the enclosure
First-Time Startup and Modularity
The Logic Enclosure is built with a user-first, modular design. During the first startup, the system prompts the user to select which sensors and modules are installed, allowing for full customization based on individual needs. Once the user completes the initial configuration, the enclosure automatically runs a series of diagnostic tests. These tests verify the functionality of installed fans and sensors, ensuring everything is working as expected and providing feedback if any issues are detected.
Dynamic Automation
The enclosure’s algorithms leverage sensor data to dynamically adjust fan speeds and lighting, creating an efficient and responsive environment:
Fan Speed Control: Fans automatically adjust their speed based on real-time air quality readings from the BME680 and PMS5003 sensors. This ensures optimal filtration performance while minimizing noise and energy consumption.
Lighting Control: The WS2811 LED strip automatically adjusts its brightness or state to communicate the enclosure’s operational status, providing clear visual feedback for users.
Fire Safety Alerts: Fire safety is managed through dual sensor inputs, including the MQ2 and optical smoke sensors, which deliver instant alerts in hazardous situations to protect your workspace.


Real-Time Monitoring and Control
The enclosure continuously tracks critical environmental variables and displays them in real-time for the user:
Environmental Monitoring: Key variables such as temperature (DHT22 and BME680), humidity, and air quality are monitored and displayed. Users also have the option to store this data on an SD card for generating detailed performance graphs.
Filament Tracking: The HX711 load cells monitor filament weight, providing precise usage tracking and helping to avoid mid-print material shortages
Reliability Features
To ensure a dependable experience, the enclosure incorporates robust reliability checks:
Automated Startup Checks: During startup, the system validates the functionality of all installed components, ensuring everything operates as expected.
Error Detection and Manual Overrides: Built-in error detection identifies any issues during operation, while manual override options allow for user flexibility and safety in critical situations.
License
The Clura project is fully open source, empowering makers to customize, adapt, and improve the enclosure to suit their needs. All design files, firmware, and documentation are shared under the Creative Commons Attribution-NonCommercial (CC BY-NC) license.
What This Means:
- Personal Use: You are free to download, modify, and build the enclosure for non-commercial purposes.
- Attribution: Any shared or remixed versions must credit the original Clura project.
- Non-Commercial: The project cannot be used for profit-making ventures without prior permission.
This licensing ensures accessibility while protecting the project from unauthorized commercialization. By keeping it open-source, we aim to foster innovation and collaboration within the maker community.


Community Upgrade Marketplace
We’re committed to fostering a vibrant ecosystem around Clura by creating an Upgrade Shop. This platform allows community members to showcase and sell their custom upgrades and enhancements for the enclosure.
How It Works:
- For Designers: Share and monetize your innovative upgrades with the community. Commercial designs are fully allowed under our open-source license given prior permission, ensuring you have the freedom to profit from your creativity. (for more details contact us)
- Support for Logistics and Production: If you want help scaling your designs, we can assist with manufacturing and shipping, making it easier to bring your ideas to life and reach a global audience.
FAQ
Most frequent questions and answers
Just send us the question via email or Discord. We try to respond to every form of communication within 48 hours, 7 days a week. If you need help right away consider writing in the discord group.
Every file is available on the GitHub page. However, you can also find links to the relevant files in the corresponding section of this webpage for each topic.
I am a firm believer in the open source community, and the benefits that it has toward the innovation in our sector. For now the files for this project will be released with an CC NC license. You can read more about this decision in this post.
You can contact us from the support page or email directly me at: Fabrizio@printbox.dev
The team is already working on other features that will be released when ready. We try to make them backwards compatible with every previous version. However, it might be necessary to change some acrylic panels in certain cases. We have also setup a community driven upgrade center, where we test and approve modifications for the enclosure.